Exposed aggregate concrete can be a great way to revamp an outdoor area like a driveway or patio. From driveways to pathways, to patios and decks, it can be used to breathe personality and character into otherwise understated areas.
While the process is relatively quick, applying it can prove to be challenging. Not only do you need to get the actual concrete mixture correct, but you also need to work with dangerous chemicals that require proper training.
For this reason, it’s best not to turn it into your next DIY project but rather to enlist the services of a company that specializes in this type of concrete.
Even though it’s not recommended that you try to apply exposed aggregate concrete on your own, it’s a very interesting process. Plus, understanding how it’s applied will help you to keep your surface looking good as new for longer.
Read on to find out how that beautiful finish is achieved and what you can do to keep it in tip-top condition for years to come.
Concept Concrete specialises in the removal or replacement of concrete. We don’t offer repair and resurfacing services. Sorry for any inconvenience.
If you want to learn more about exposed aggregate concrete, check out our resources:
1. How Much Does Exposed Aggregate Concrete Cost
2. How to Choose the Best Exposed Aggregate Concrete Surface
3. Plain Concrete vs. Exposed Aggregate: How to Settle the Debate
4. Exposed Aggregate vs. Stamped Concrete: What’s Best For You?
5. Is Exposed Aggregate Concrete Worth It?
6. How Long Will Exposed Aggregate Last?
Getting ready for your new concrete surface
When it comes to applying exposed aggregate concrete, a lot of it rests on the prep work. Since concrete is porous, you need to make sure that the soil is compact and well-drained. Get this step wrong, and the chances that your concrete will crack are greater. Get ready to get your hands dirty and do some digging.
The ground must be dug to the proper depth. Then, using the flat side of a rake, smooth the surface to ensure that it’s level. As mentioned, the soil must be compact. To do this, you’ll need a tamper to pack the soil. Once you have a level, compact surface, you’re ready to move on to the concrete part.
Applying exposed aggregate concrete
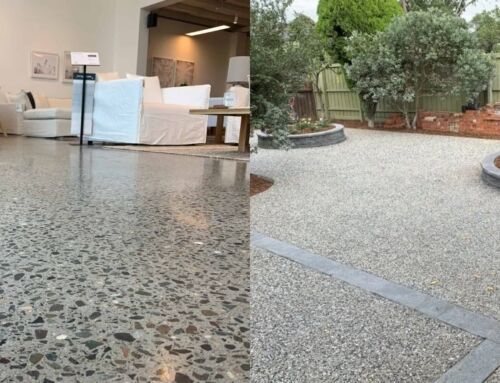
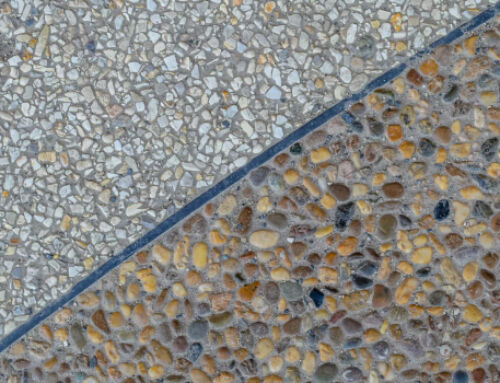
Exposed aggregate is a type of decorative concrete. Created by removing the cement’s top layer to expose the underlying aggregate, it’s a very durable material that boasts a raw, natural look. There are several types of decorative aggregates, in different shapes and sizes, that you can add to the concrete. The most popular examples include natural stones like granite, limestone, and quartz.
Mixing the concrete
Before you can start to mix the concrete, you first need to wash the aggregate that you’ve selected in water. Then, you can proceed to creating your own mix of aggregate concrete. Usually, you’ll use 15% cement powder, 15% water, and the rest (70%) will be sand and aggregate (this mixture should be about 70% aggregate and 30% sand). Using a drill and paddle bit, make sure that you blend this concrete mixture well until it resembles a thick consistency.
Pouring and leveling the concrete
When it’s time to pour the concrete, you have two options. You can either use a truck to pour it directly into the form (a wooden perimeter that’s built around the site where you’ll be pouring the concrete) or fill a wheelbarrow that you’ll simply tilt. While you might not need a truck, you’ll need an extra pair of hands to help you spread out the concrete using a rake or shovel.
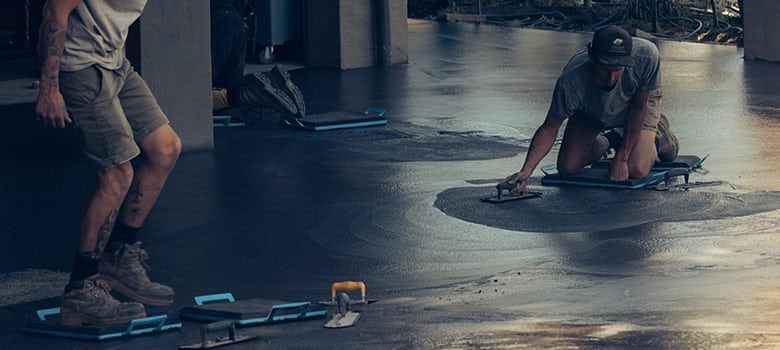
Once you’ve spread out the poured concrete, you need to use a screeding tool to flatten the concrete while it’s still wet. This process involves moving a wide wooden plank back and forth over the wet concrete.
Exposing the aggregate
After the concrete has been poured onto the surface that you’ve prepared, there are three common ways to reveal the decorative aggregate. Depending on the project’s scope and desired finish, you don’t necessarily need to use specialised equipment or chemicals.
Method 1: Washing and brushing
Brushing and washing is the oldest method. All you need is water and a stiff nylon-bristle brush. When applying this method, you’ll simply wash away the surface mortar’s thin layer that covers the aggregate. To do this, you’ll first spray water and then scrub it with a brush to reveal the aggregate.
The challenge of this method is getting the timing right. You should start as soon as the surface mortar can be removed without knocking the aggregate out of place. As it’s difficult to get this timing spot on, applying the washing-and-brushing technique is best left for smaller projects.
Method 2: Abrasive blasting
You can also use sandblasting or shot blasting (also called grit blasting) to expose the aggregate after the concrete has hardened. If the decorative feature of concrete is critical, this method should be avoided as it can fracture the aggregate.
Method 3: Chemical surface retarders
The majority of concreters will spray a chemical surface retarder to the concrete to reveal the aggregate. The benefit of using this strategy is that the retarder will let the concrete set slower so that you can still remove the thin layer of the surface mortar up to 24 hours later. This makes it a good choice for bigger projects.
At Concept Concrete, this is our preferred choice. We also cover the surface with plastic sheeting for more or less 24 hours. This is done to prevent the top layer from hardening further before we can power-wash the surface to expose the beautiful aggregate underneath.
Curing
Concrete can dry in just a matter of hours, but you’ll need to wait more or less 24 hours for the new surface to cure fully. This means that there will be minimal disruption to your daily routine. However, it’s recommended that you don’t place excess weight, such as a vehicle, on the new surface for 10 days at least.
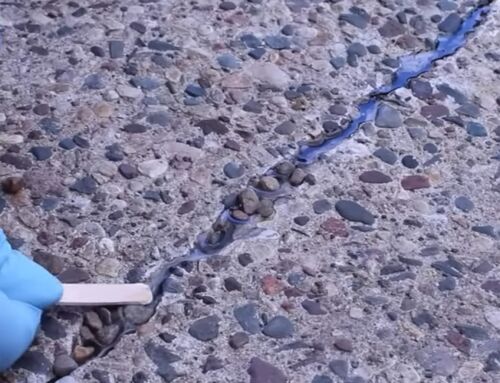
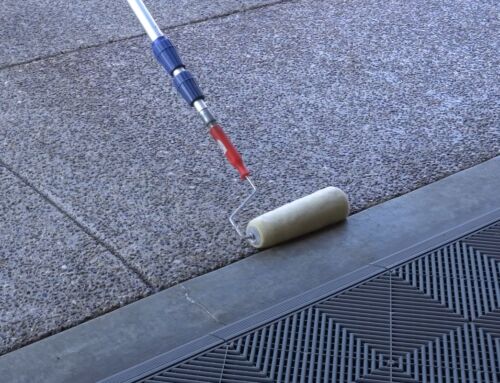
Sealing
After you’ve applied your concrete, you’ll also need to seal it every 1-3 years, depending on the traffic volume and weather. The most common sealant is a film-forming acrylic resin. Not only will it offer protection against stains and impact, but it will also highlight the finish and depth of the exposed aggregate.
Maintaining your new surface
To maintain exposed aggregate concrete, you’ll need to clean it regularly. Ideally, you should clean it once a week. Though, this is just a quick 10-minute job (15 minutes tops). You can use a leaf blower to remove the dust and dirt, but simply sweeping it with a good old-fashioned broom will get the same results. After you have removed any debris, it’s time to use your garden hose to break apart tougher grime and stubborn stains.
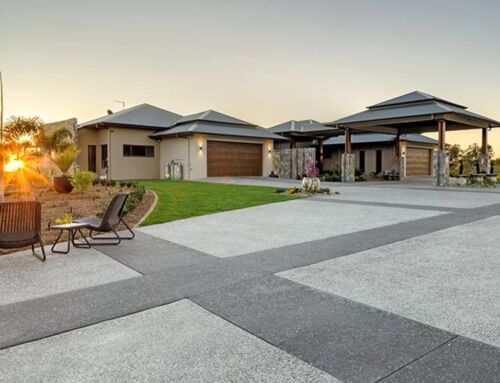
At the end of the day, it’s important to remember that you’re paying for a hard-wearing and decorative surface that can last as long as three decades with proper maintenance. What’s more, it’s extremely versatile as it can be used for all outdoor spaces. As a matter of fact, you can even use it on walls and building facades.
So, while you’ll be paying more than normal class concrete, you’ll be getting so much more in return.
Check out our complete article: How Much Does Exposed Aggregate Concrete Cost in Melbourne
Looking to apply exposed aggregate concrete in Melbourne?
Laying and setting this specialized concrete is a complicated process. Not only do you need to get the timing perfect, but you’ll also need to work with dangerous chemicals that can’t be handled without proper training.
Also, preparing the actual concrete can be tricky. The concrete needs to be mixed with the right amount of water. If you get this ratio wrong, you could end up with concrete that cracks or crumbles.
If you’re eager to add exposed aggregate concrete to a pathway or feature wall, reach out to the team at Concept Concrete at 1300 366 343 and let’s chat about your project. We offer obligation-free consultations and free quotes. So, whether you simply want to look at your different options or need a quote, we’re ready to help.