Are you frustrated by uneven concrete slabs in your Melbourne home or business?
More than an inconvenience, uneven concrete can pose a significant safety risk for accidents and injuries to you, your family, your staff or your customers.
Whether it’s your driveway, patio, or sidewalk, addressing uneven concrete slabs is essential for maintaining the safety and integrity of your property.
In this guide, we’ll break down the steps to fixing uneven concrete slabs. We’ll explore everything from identifying the root causes of unevenness to implementing the right techniques for repair and offering insider tricks to achieve professional results.
Plus, we’ll walk you through the considerations you need to keep in mind before embarking on this project to ensure a successful outcome.
Read on to learn how to enjoy smooth, safe surfaces again.
What is Concrete Levelling?
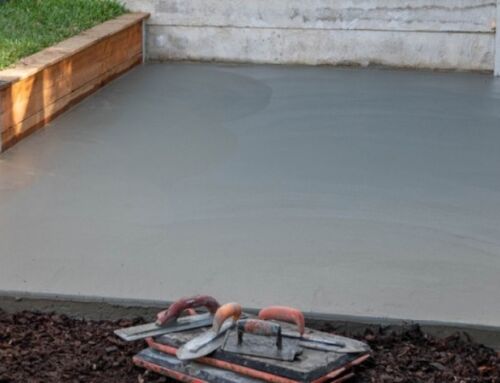
Concrete levelling, also known as slab jacking or mud jacking, is a versatile technique designed to address the issue of uneven concrete surfaces.
This process involves lifting and levelling sunken or uneven concrete slabs by injecting a specialised mixture underneath the slab.
While the primary goal is to restore the surface to its original level, concrete levelling offers a myriad of benefits beyond mere aesthetics.
One of the key advantages of concrete levelling is its cost-effectiveness compared to traditional methods like slab replacement.
By salvaging existing concrete slabs, you can save significantly on material and labour costs while achieving comparable results. Concrete levelling is a time-efficient solution, allowing for quick turnaround times and minimal disruption to daily activities.
By avoiding the need for extensive demolition and replacement, this technique reduces waste generation and carbon emissions associated with new concrete production.
The use of eco-friendly materials in the levelling mixture further minimises environmental impact, making it a sustainable choice for property owners.
Concrete levelling enhances safety by eliminating tripping hazards and preventing water pooling, which can lead to slip-and-fall accidents.
By restoring the structural integrity of concrete surfaces, this technique ensures a stable and secure environment for both residents and visitors alike.
Be Aware of Environmental Considerations
While concrete levelling itself is a relatively eco-friendly solution compared to slab replacement, there are still certain considerations to keep in mind to minimise the environmental footprint and ensure legal compliance.
While the levelling mixture itself is typically composed of environmentally friendly materials, such as sand, cement, and water, proper disposal practices must be followed to prevent contamination of soil and water sources.
Homeowners may need to coordinate with local waste management authorities to ensure proper disposal or recycling of excess materials.
How to Match Your Needs with Resources
Understanding the extent of the unevenness, the underlying causes, and any associated structural issues will help tailor the most appropriate solution for your situation.
Here’s how to get started:
Assessing Needs and Requirements
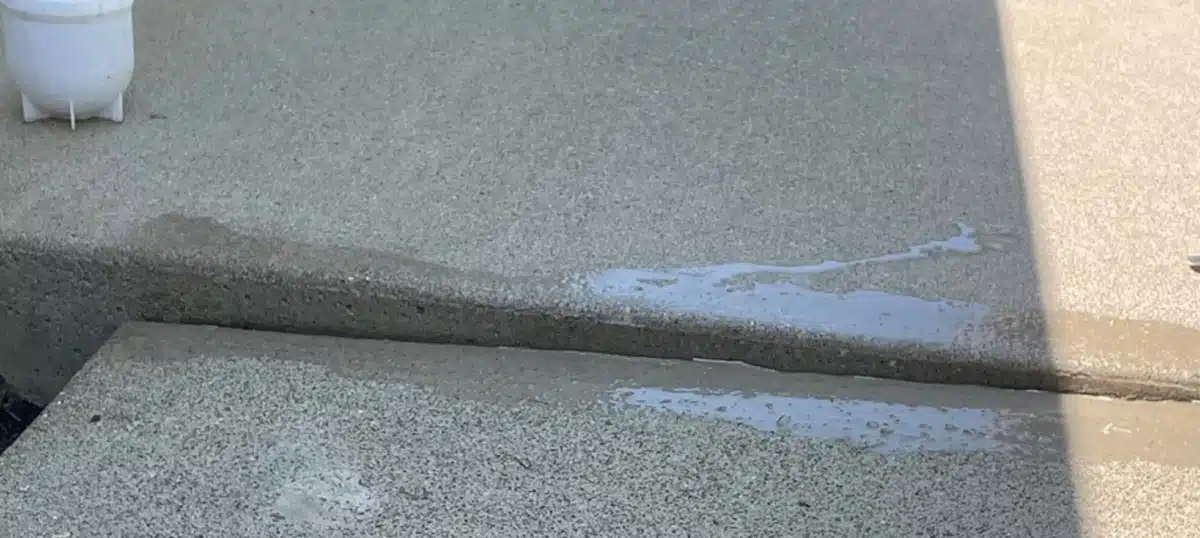
Begin by conducting a thorough inspection of the affected concrete slabs. Determine the extent of the unevenness, whether it’s minor surface imperfections or significant sinking or settlement.
Identify any underlying factors contributing to the unevenness, such as soil erosion, water drainage issues, or tree root intrusion. Consider the overall condition of the concrete and whether any repairs or reinforcements are needed beyond levelling.
Matching Solutions with Your Needs
Based on your assessment, explore different concrete levelling techniques and materials to find the best fit for your needs.
Traditional methods like mud jacking or polyurethane foam injection may be suitable for larger-scale repairs, while DIY solutions such as self-levelling concrete or patching compounds may suffice for minor surface imperfections.
When selecting the appropriate solution, consider factors such as:
- Cost
- Time
- Durability
- Environmental impact
Gathering Tools and Resources
Once you’ve determined the most suitable levelling method, gather the necessary tools and resources for the job. This may include:
- Safety equipment such as gloves, goggles, and dust masks to protect yourself during the levelling process.
- Levelling materials such as concrete mix, polyurethane foam, or patching compounds, depending on the chosen technique.
- Tools for surface preparation, such as pressure washers, concrete grinders, or wire brushes to clean and smooth the surface.
- Equipment for mixing and applying levelling materials, such as wheelbarrows, trowels, and mixing paddles.
- Depending on the complexity of the project, you may also need access to specialised equipment such as concrete pumps or injection systems.
A Guide to Quality Components
When embarking on a concrete levelling project, having the right components at your disposal can make all the difference in achieving professional results.
From levelling materials to essential tools, here’s a breakdown of the key components included in this tutorial, along with recommendations and tips for sourcing quality components locally:
Levelling Materials
- Self-levelling concrete: Brands like Ardex, Mapei, and Sakrete offer high-quality self-levelling concrete mixes suitable for minor surface levelling. Look for products with fast-setting formulas for quick results.
- Patching compounds: DAP, Quikrete, and Sika are reputable brands known for their durable and easy-to-use patching compounds, ideal for repairing small cracks and imperfections in concrete surfaces.
Tools for Surface Preparation
- Pressure washer: Invest in a reliable pressure washer from brands like Karcher, Ryobi, or Bosch to thoroughly clean and prep the concrete surface before levelling.
- Concrete grinder: For more extensive surface preparation, consider renting or purchasing a concrete grinder from equipment rental stores or home improvement retailers.
Mixing and Application Tools
- Wheelbarrow: Choose a sturdy, heavy-duty wheelbarrow capable of transporting and mixing levelling materials effectively. Look for models with pneumatic tyres for easy manoeuvrability.
- Trowels: Opt for high-quality trowels made from durable materials like stainless steel or carbon steel for smooth and even application of levelling materials.
- Mixing paddles: Invest in a robust mixing paddle compatible with your power drill for efficient and thorough mixing of self-levelling concrete or patching compounds.
Safety Equipment
- Gloves: Select durable, puncture-resistant gloves from reputable brands like Mechanix, Ironclad, or Ansell to protect your hands during mixing and application.
- Goggles: Ensure proper eye protection with ANSI-approved safety goggles from trusted brands such as 3M, Dewalt, or Uvex.
- Dust masks: Invest in NIOSH-approved dust masks or respirators to prevent inhalation of airborne particles and dust during surface preparation and mixing.
Step-by-Step Installation Guide
Step 1: Prepare the Surface
- Start by thoroughly cleaning the concrete surface using a pressure washer to remove dirt, debris, and any loose particles.
- If necessary, use a concrete grinder to smooth out any rough patches or uneven areas, ensuring a clean and level surface for the levelling material.
Step 2: Mix the Levelling Material
- Follow the manufacturer’s instructions to mix the self-levelling concrete or patching compound in a wheelbarrow or mixing container.
- Use a mixing paddle attached to a power drill for efficient and thorough mixing, ensuring a smooth and uniform consistency.
Step 3: Apply the Levelling Material
- Pour the mixed levelling material onto the prepared concrete surface, starting from the lowest point and working your way towards the edges.
- Use a trowel to spread the levelling material evenly across the surface, filling any cracks or depressions as you go.
- Work quickly but carefully to ensure the levelling material doesn’t begin to set before you’ve finished applying it.
Step 4: Allow for Setting Time
- Follow the manufacturer’s recommended setting time for the levelling material to cure and harden properly.
- Avoid walking or placing heavy objects on the levelling material during this time to prevent damage or uneven curing.
Step 5: Final Inspection
- Once the levelling material has fully set, inspect the surface for any remaining imperfections or unevenness.
- Use a straightedge or level to check for uniformity across the surface, making any necessary adjustments or touch-ups as needed.
When to Call in a Professional Installer
While many concrete levelling projects can be tackled as DIY endeavours, there are instances where it’s best to enlist the expertise of a professional installer.
Consider calling in a professional if:
- The unevenness or damage to the concrete surface is extensive or structural.
- You lack the necessary tools, equipment, or experience to safely and effectively complete the project.
- Time constraints or other factors make DIY installation impractical or risky.
By following these step-by-step instructions, prioritising safety precautions and best practices, and knowing when to seek professional assistance, you can achieve professional-quality results with your concrete levelling project.
How Much Does a Concrete Levelling Project Cost?
| Cost Component | Estimated Cost |
|---|---|
| Levelling materials | $100 – $500 |
| Tools and equipment | $50 – $200 |
| Safety equipment | $20 – $50 |
| Permit and inspection fees | Varies by location |
| Professional installation | $500 – $1500 (if needed) |
Ready to Level Up Your Concrete Surfaces? Contact Concept Concrete Today!
Are you ready to transform your uneven concrete slabs into smooth, safe, and aesthetically pleasing surfaces?
Reach out to Concept Concrete for personalised advice, expert guidance, and a competitive quote tailored to your specific needs.
With our industry-leading expertise and commitment to excellence, we’ll help you achieve outstanding results that stand the test of time.