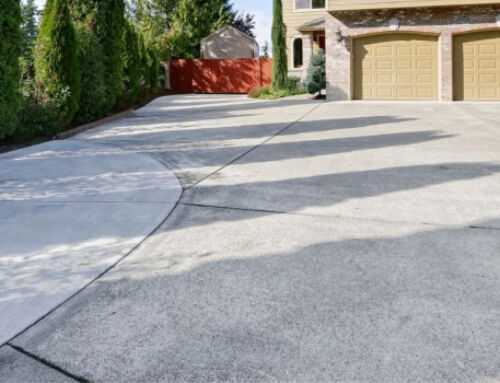
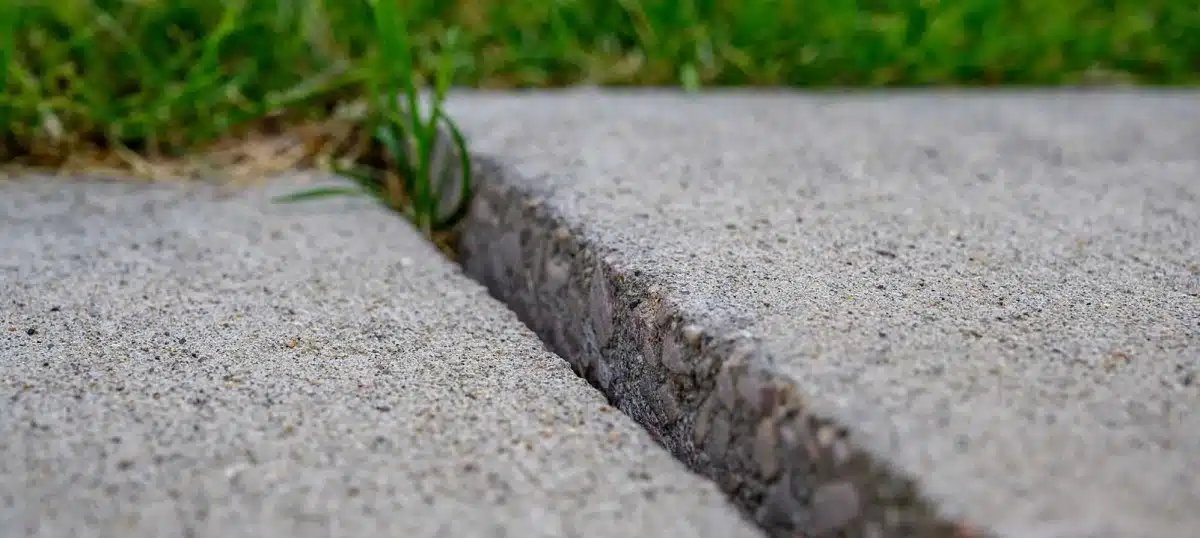
Is your driveway cracked or uneven?
More than a frustrating eyesore, an uneven driveway poses potential safety hazards to you, your family and your vehicles.
So, do you need to go out and organise a completely new driveway installation?
Short answer – no.
Lifting uneven concrete can restore the look and uniform feel of damaged concrete. Whether caused by soil erosion, tree roots, or even substandard installation, an uneven surface can be fixed.
And we’ll show you how.
In this guide, we’ll cover everything from assessing the extent of the damage to executing the necessary repairs. We’ll delve into considerations such as safety measures, materials needed, and steps to follow.
If you’re ready to bid farewell to pesky potholes and uneven surfaces, read on.
Concrete Resurfacing: An Overview
Resurfacing involves applying a new layer of concrete over the existing surface, effectively smoothing out any imperfections and restoring its structural integrity.
This approach is:
- Cost-Effective: Compared to ripping out and replacing the entire driveway, resurfacing is a much more budget-friendly option. It allows you to achieve a fresh, even surface without breaking the bank.
- Time-Efficient: Resurfacing typically takes less time than a complete driveway overhaul. With minimal disruption to your daily routine, you can enjoy a smoother driveway in no time.
- Versatile: Whether your driveway suffers from minor cracks, surface pitting, or unevenness, resurfacing can address a wide range of issues. It’s a versatile solution that caters to various repair needs.
- Durabile: The new layer of concrete not only improves the appearance of your driveway but also enhances its durability. It adds an extra layer of protection, prolonging the lifespan of your pavement.
- Aesthetically Appealing: Say goodbye to unsightly cracks and bumps! Resurfacing gives your driveway a fresh lease on life, boosting its curb appeal and making a positive impression on visitors.
Assessing Your Needs and Gathering the Right Tools
Every driveway is different, and understanding what yours demands will set the stage for a successful transformation. Here’s how to assess your needs and gather the tools and resources necessary for the job:
Assessing Home/Property Needs:
- Traffic Volume: Consider the volume and type of traffic your driveway typically experiences. If you have multiple vehicles coming and going or heavy vehicles like trucks or trailers, you’ll need a more robust resurfacing solution to withstand the wear and tear.
- Aesthetic Preferences: Think about the aesthetic vision you have for your driveway. Do you prefer a traditional concrete finish, or are you looking to add decorative elements such as stamped patterns or exposed aggregates? Understanding your aesthetic preferences will help guide your material and design choices.
- Drainage Requirements: Evaluate your property’s drainage system and how it interacts with your driveway. Proper drainage is essential for preventing water buildup and potential damage to the concrete surface. Consider incorporating drainage solutions such as channels or permeable pavers to improve water runoff.
- Climate Considerations: Take into account Melbourne’s diverse climate and how it may impact your driveway. From scorching summers to chilly winters and everything in between, your driveway needs to withstand the elements year-round. Choose materials and construction methods that are suited to Melbourne’s climate for optimal durability.
Gathering Tools and Resources:
- Concrete Mixer: Depending on the size of your driveway and the extent of the resurfacing project, you may need a concrete mixer to prepare the new concrete mix. Consider renting or purchasing a mixer suitable for your needs.
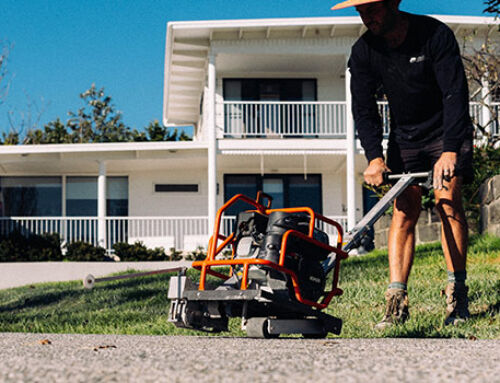
- Concrete Saw: A concrete saw may be necessary for cutting and removing any damaged or uneven sections of the existing driveway before resurfacing. Ensure you have access to a quality saw capable of handling concrete-cutting tasks.
- Trowels and Floats: Trowels and floats are essential tools for spreading and smoothing the new concrete surface during the resurfacing process. Invest in high-quality trowels and floats to achieve professional-looking results.
- Protective Gear: Don’t forget to prioritise safety by wearing appropriate protective gear, including gloves, safety glasses, and sturdy footwear, when working with concrete and construction tools.
Step-by-Step Driveway Resurfacing
Step 1: Prepare the Surface
- Start by cleaning the existing concrete surface thoroughly to remove any dirt, debris, or oil stains. Use a pressure washer or stiff-bristled brush and detergent for stubborn stains.
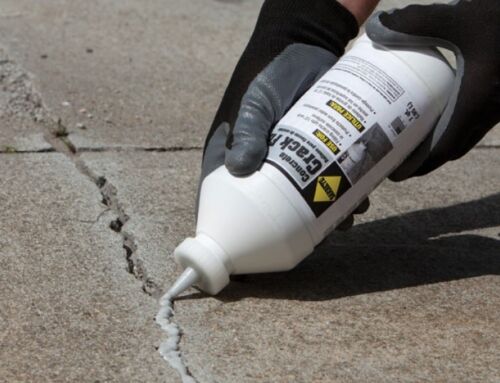
- Next, inspect the surface for any cracks, holes, or uneven areas. Use a concrete saw to cut out and remove damaged sections, ensuring clean edges for optimal bonding.
Step 2: Apply Bonding Agent
- Apply a bonding agent or primer to the prepared surface according to the manufacturer’s instructions.
- This helps improve adhesion between the existing concrete and the new resurfacing layer.
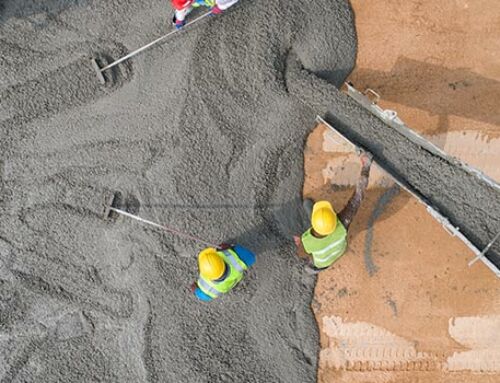
Step 3: Mix and Apply Concrete Resurfacer
- Mix the concrete resurfacer according to the manufacturer’s instructions, ensuring a smooth and lump-free consistency.
- Working in small sections, pour the resurfacer onto the prepared surface and spread it evenly using a trowel or squeegee. Work quickly to ensure the resurfacer doesn’t start to set before you finish.
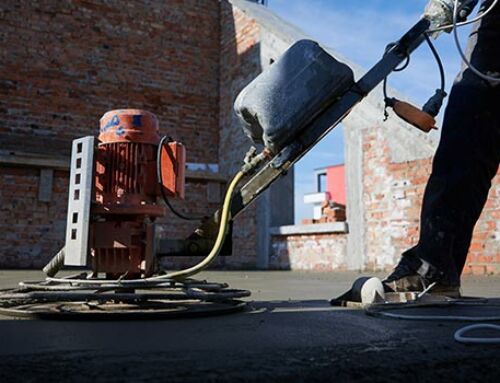
Step 4: Smooth and Texture
- Once the resurfacer is applied, use a long-handled squeegee or straightedge to smooth and level the surface. Pay attention to maintaining a consistent thickness throughout.
- If desired, add texture to the surface using a broom or textured roller for improved traction and visual appeal.
Step 5: Cure and Seal
- Allow the resurfaced driveway to cure according to the manufacturer’s recommendations, typically 24 to 48 hours. During this time, protect the surface from foot and vehicle traffic.
- Once cured, apply a concrete sealer to protect the surface from stains, moisture, and UV damage. Choose a sealer suitable for driveway use and follow the application instructions carefully.
Sealing Your Concrete Driveway in Melbourne
Safety Precautions and Best Practices:
- Wear appropriate protective gear, including gloves, safety glasses, and sturdy footwear, to protect against concrete splatter and sharp tools.
- Work in a well-ventilated area and avoid prolonged exposure to concrete dust and fumes.
- Follow all safety guidelines and instructions provided by the manufacturer for the tools and materials used.
- Keep children and pets away from the work area to prevent accidents or injuries.
When to Call a Professional:
- If you encounter significant structural issues such as extensive cracking, sinking, or heaving of the driveway surface.
- If you’re unsure about your ability to safely and effectively complete the resurfacing process, especially when working with heavy equipment or unfamiliar materials.
- If the project requires specialised skills or equipment beyond your expertise, such as repairing intricate decorative finishes or addressing complex drainage issues.
By following these step-by-step instructions and adhering to safety precautions and best practices, you can successfully resurface your concrete driveway and achieve professional-quality results.
However, if you encounter challenges beyond your capabilities or comfort level, don’t hesitate to seek assistance from a professional installer to ensure the job is done right.
Budgeting Tips for Your Resurfacing Project
| Component | Estimated Cost |
|---|---|
| Concrete Resurfacer | $50 – $100 per bag |
| Bonding Agent/Primer | $20 – $50 per litre |
| Concrete Saw Rental | $100 – $200 per day |
| Trowels and Floats | $20 – $50 each |
| Protective Gear | $20 – $50 per item |
| Concrete Sealer | $50 – $100 per litre |
| Miscellaneous Supplies | $50 – $100 |
| Total Estimated Cost | $500 – $1000 |
Tips for Budgeting and Cost Saving:
- Plan Ahead: Take the time to research and gather quotes from multiple suppliers and contractors to ensure you’re getting the best value for your money.
- DIY vs Professional: Consider whether you have the skills and equipment necessary to tackle the project yourself or if hiring a professional contractor is a more cost-effective option.
- Buy in Bulk: Purchase materials such as concrete resurfacer and sealer in bulk to take advantage of volume discounts and reduce overall costs.
- Reuse and Recycle: Look for opportunities to reuse or repurpose existing materials wherever possible to minimise waste and save money.
- Timing: Take advantage of seasonal sales and promotions to purchase materials at discounted prices, especially during slower construction periods.
By carefully considering the cost breakdown, exploring potential grants and subsidies, and implementing cost-saving strategies, you can budget for your driveway resurfacing project without breaking the bank.
Final Thoughts: Driveway Resurfacing Simplified
Here’s a recap of the key points we’ve covered:
- Assess Your Needs: Consider factors such as traffic volume, aesthetic preferences, drainage requirements, and climate considerations before embarking on your driveway resurfacing project.
- Gather Quality Components: Invest in high-quality concrete mixes, tools, and protective gear from reputable brands to ensure professional results.
- Follow Step-by-Step Instructions: Adhere to safety precautions and best practices while following the step-by-step installation process outlined in the guide.
- Consider Financial Implications: Budget effectively by understanding the cost breakdown, exploring potential grants and subsidies, and implementing cost-saving strategies.
- Know When to Seek Help: Call in a professional installer if you encounter significant challenges or structural issues beyond your expertise.
By following these guidelines and taking a strategic approach to your driveway resurfacing project, you can transform your uneven concrete driveway into a smooth, seamless surface.
Ready to Transform Your Driveway? Contact Concept Concrete Today!
If you’re ready to embark on your driveway resurfacing journey or have any questions about the process, don’t hesitate to reach out to us at Concept Concrete.
Our team of experienced professionals is here to provide you with personalised advice, guidance, and a competitive quote tailored to your specific needs.
Whether you’re a DIY enthusiast looking for expert tips or prefer to leave the job in the hands of seasoned professionals, Concept Concrete has you covered.
With our commitment to quality craftsmanship and customer satisfaction, we’ll ensure your driveway makeover exceeds your expectations.