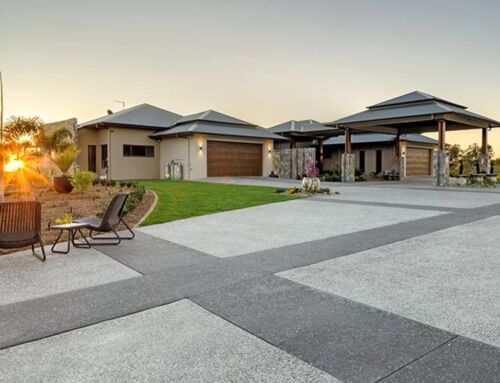
A well-maintained driveway can be a game-changer for your home’s look and feel.
But what happens when your exposed aggregate driveway starts showing signs of wear and tear?
Thankfully, repairing an exposed aggregate finish might be easier than you think.
Even better, you don’t have to be an expert to upgrade your driveway’s condition (though the pros will have the tools and team to drive even better restoration results).
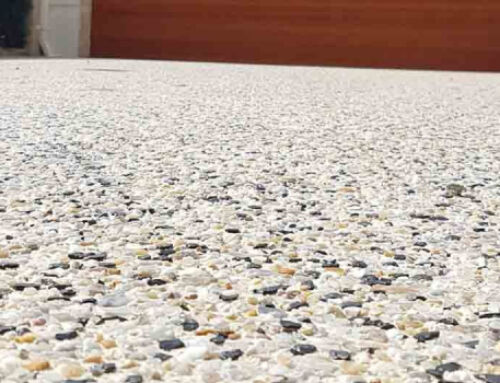
Exposed aggregate driveways are popular thanks to their durability, slip resistance, and aesthetic appeal. However, exposure to harsh weather, heavy vehicles, and everyday use can leave its mark, making repairs inevitable.
Whether you’re a DIY enthusiast or considering professional help, understanding the repair process can save you time and money, and ensure your driveway remains a functional and appealing aspect of your home for years to come.
So let’s get right into it.
Melbourne Permits and Inspections
Repairing your concrete driveway may require permits and inspections, depending on the scope of the work.
Here’s a general guideline:
- Minor Repairs: Small-scale repairs, such as filling in minor cracks or cleaning and resealing, typically do not require permits or inspections. These tasks can usually be done without formal approval.
- Major Repairs or Replacement: If your repair involves significant changes, such as replacing a large section of the driveway, it’s advisable to check with your local council regarding necessary permits. They may require you to obtain approval before proceeding.
- Drainage Considerations: In some cases, alterations to your driveway may impact the drainage of rainwater. Ensure that your repairs do not disrupt the existing drainage system, as this could have implications for stormwater management.
- Professional Guidance: It’s always a good idea to consult with a professional contractor who is well-versed in local regulations. They can guide you through the permitting process and help ensure your repair project complies with Melbourne’s regulations.
Assessing Your Needs and Gathering Resources
Before diving into a repair job, consider the following:
- The extent of Damage: Evaluate the extent of the damage. Are you dealing with minor cracks and surface imperfections, or is a more significant repair or replacement necessary?
- Budget: Determine your budget for the repair project. Knowing your financial constraints will help you make informed decisions about the scope of the repair and whether you need professional assistance.
- Timeframe: Consider your timeframe for completing the repair. Some repairs can be done quickly, while larger projects may require more time.
- DIY vs. Professional Help: Assess your DIY skills and the complexity of the repair. While minor repairs can often be done independently, more extensive projects may benefit from professional expertise.
- Future Maintenance: Think about the long-term maintenance of your driveway. Are you willing to invest time and effort into regular cleaning and sealing to prolong its life?
Gathering Tools and Resources
Once you’ve assessed your needs, it’s time to gather the tools and resources required for the repair. Here’s a list of essentials:
- Safety Gear: Ensure you have safety gear such as gloves, safety glasses, and a dust mask to protect yourself during the repair.
- Cleaning Supplies: Depending on the extent of the repair, you may need cleaning supplies like a pressure washer, a stiff brush, and a concrete cleaner to prepare the surface.
- Repair Materials: Purchase the necessary repair materials, which may include concrete mix, bonding agent, and decorative aggregate that matches your driveway’s existing look.
- Tools: Gather tools such as a trowel, float, edging tool, and a concrete sealer applicator.
- Professional Help: If you’re unsure about your DIY skills or the repair is extensive, consider contacting a professional contractor with experience in exposed aggregate driveways.
- Local Suppliers: Identify local suppliers for your materials, as this can save you time and money. They can also guide in choosing the right products.
- Permits (if needed): If your repair project requires permits, ensure you have all the necessary documentation in place before starting work.
By considering your specific needs and assembling the right tools and resources, you’ll be well-prepared to tackle the repair of your exposed aggregate driveway.
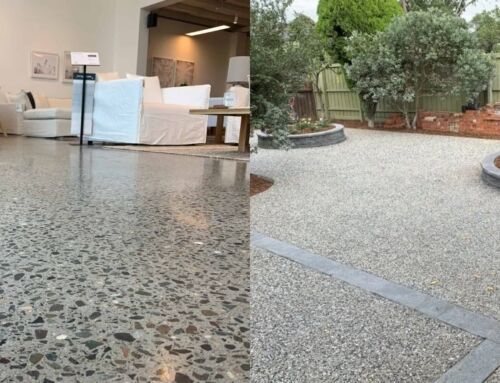
Exposed Aggregate vs. Traditional Concrete: What’s Best For You?
Repair Components, Recommendations, and Local Sourcing
We’ve rounded up the essential components you’ll need for repairing your driveway.
Remember, a DIY approach can end up being time-consuming and expensive if you need to repair any mistakes.
If you’re looking to save time and money, scroll to the bottom to see how we can help repair your chipped, damaged or worn driveway.
Concrete Mix: Opt for a high-quality concrete mix suitable for exposed aggregate repairs.
Bonding Agent: Use a bonding agent to ensure a strong bond between the existing surface and the new concrete.
Decorative Aggregate: Choose decorative aggregate that matches the appearance of your existing driveway. Local suppliers often have a variety of options, such as crushed pebbles or coloured glass.
Tools:
- Trowel: A pointed-end trowel for precise application.
- Float: Look for a wooden or magnesium blade for surface smoothing.
- Edging Tool: To create clean edges along the driveway.
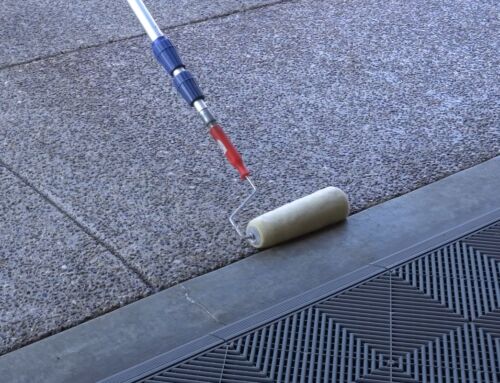
- Concrete Sealer Applicator: A roller or brush for applying the concrete sealer.
Concrete Cleaner: Use a concrete cleaner suitable for exposed aggregate surfaces.
Concrete Sealer: Select a high-quality concrete sealer designed for exposed aggregate.
Safety Gear: Ensure you have safety gear, including gloves, safety glasses, and a dust mask for protection during the repair.
Whether you choose to DIY or seek professional help, having the right materials and tools is key to a job well done.
Step-by-Step Repair Guide
Step 1: Safety First
- Safety Gear: Ensure you wear gloves, safety glasses, and a dust mask to protect yourself from concrete dust and chemicals.
- Ventilation: Work in a well-ventilated area to minimise exposure to fumes.
- Sturdy Footwear: Wear sturdy, closed-toe shoes to protect your feet.
- Tools: Ensure all tools are in good working condition before starting.
Step 2: Surface Preparation
- Clean the Surface: Use a pressure washer and concrete cleaner to thoroughly clean the damaged area. Remove dirt, debris, and loose concrete.
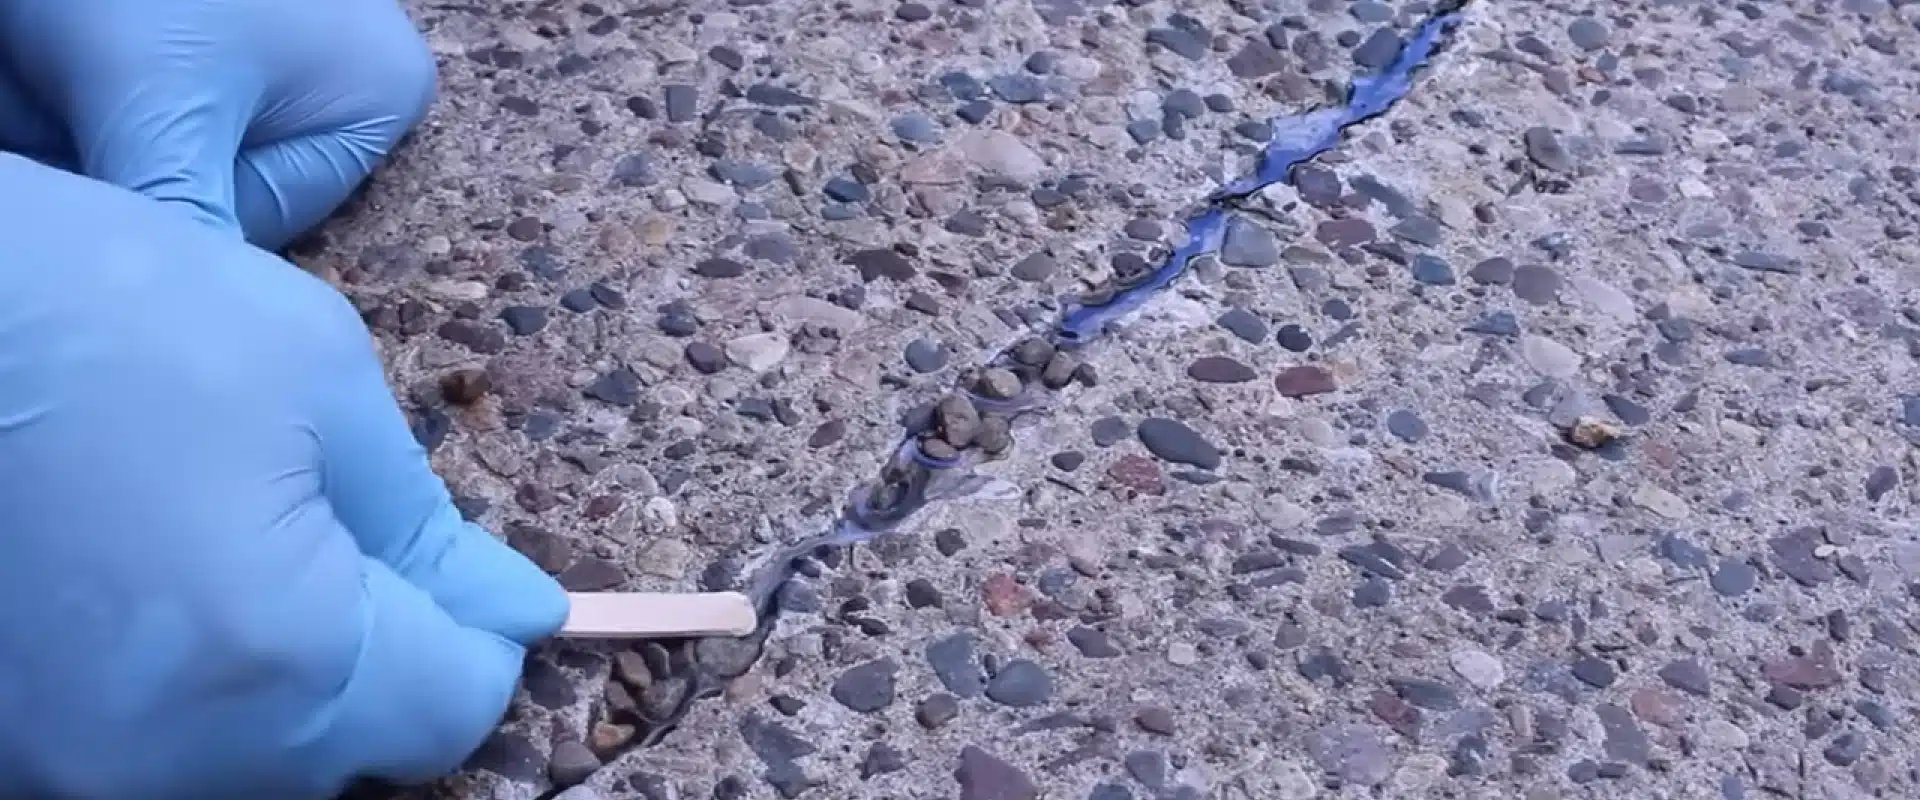
- Repair Cracks: Fill any cracks or gaps with concrete mix and allow them to cure.
Step 3: Bonding Agent Application
- Apply Bonding Agent: Use a brush to apply a bonding agent to the prepared surface. This ensures a strong bond between the existing concrete and the new mix.
- Follow Manufacturer’s Instructions: Follow the instructions provided by the bonding agent manufacturer regarding drying times.
Step 4: Mixing Concrete
- Mix Concrete: Follow the manufacturer’s instructions to prepare the concrete mix. Ensure it has the right consistency for repair work.
Step 5: Application
- Spread Concrete: Apply the mixed concrete evenly over the prepared surface, ensuring it’s level with the existing driveway.
- Add Decorative Aggregate: Sprinkle decorative aggregate evenly over the wet concrete. Press it gently to ensure good adhesion.
Step 6: Finishing Touches
- Smoothing: Use a float to smooth the surface and blend the new concrete with the existing exposed aggregate.
- Edging: Use an edging tool to create clean edges along the driveway.
Step 7: Curing
- Cure Properly: Cover the repaired area with plastic sheeting and keep it damp for at least 24 hours to allow for proper curing.
Step 8: Sealing
- Apply Sealer: Once the concrete has cured, apply a concrete sealer to protect the surface and enhance its appearance. Follow the sealer manufacturer’s instructions.
Step 9: Maintenance
- Regular Cleaning: To prolong the life of your repaired driveway, regularly clean it with a mild detergent and water. Avoid harsh chemicals.
By following this step-by-step guide, adhering to safety precautions, and knowing when to call in a professional, you’ll be on your way to restoring the beauty and functionality of your driveway.
Costs and Financial Considerations
| Expense | Cost Range |
| Concrete Mix | $60 – $100 per bag |
| Bonding Agent | $5 – $10 per litre |
| Decorative Aggregate | $50 – $150 per bag |
| Tools | $50 – $150 |
| Concrete Cleaner | $2 – $5 per litre |
| Concrete Sealer | $7 – $15 per litre |
| Safety Gear | $10 – $30 per set |
| Professional Help | Varies based on project scope |
Your Path to a Beautiful Exposed Aggregate Driveway
We’ve covered everything you need to know about repairing your exposed aggregate driveway.
Let’s recap the key takeaways:
- Exposed aggregate driveways are a blend of aesthetics and durability, enhancing your home’s curb appeal.
- They are environmentally friendly, with options for recycled materials and heat reflectivity.
- Consider permits and inspections, especially for major repairs or changes that affect drainage.
- Assess your needs, budget, timeframe, and DIY skills before starting the repair project.
- Gather quality components locally and explore trusted brands for concrete mix, bonding agents, and sealers.
- Follow the step-by-step guide for a successful repair, ensuring safety precautions and professional assistance when necessary.
- Regular maintenance is key to prolonging the life of your repaired exposed aggregate driveway.
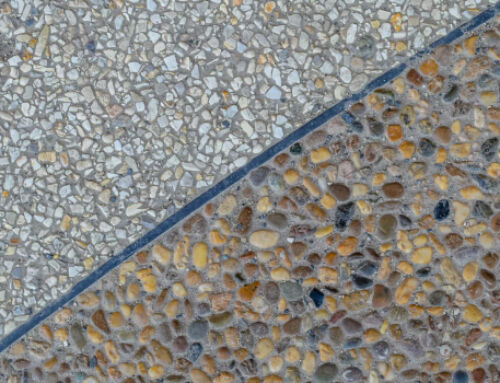
[POPULAR] Top Exposed Aggregate Colours Compared
Your Path to a Stunning Driveway Starts Here
Are you ready to breathe new life into your exposed aggregate driveway?
Whether you’re planning a repair, considering an upgrade, or simply seeking expert advice, the team at Concept Concrete is here to assist you every step of the way.
Contact us today for personalised advice, a detailed quote, or more information.